Let's be honest: the number one reason people quit composting is the smell. You start with good intentions, collecting food scraps in a container on your counter. But within a day or two, your kitchen starts smelling like a garbage dump. Fruit flies appear. Your family complains. And suddenly, composting feels like more trouble than it's worth.
Here's the good news: kitchen compost doesn't have to smell. With the right techniques and setup, you can collect food scraps for days without any odor at all. Whether you're composting for San Diego's organic waste program or maintaining a backyard pile, these proven methods will keep your kitchen fresh and your composting routine sustainable.
Why Does Kitchen Compost Smell in the First Place?
Before we fix the problem, let's understand what causes it. Compost odor isn't actually a natural part of the decomposition process—it's a sign that something's wrong with your system.
Normal composting is an aerobic process, meaning it happens with oxygen present. When organic matter breaks down with adequate oxygen, it produces carbon dioxide, water, and heat. This process is relatively odor-free, creating an earthy, soil-like smell at most.
The terrible smells—that rotten egg or sour garbage odor—come from anaerobic decomposition, which happens without oxygen. When your food scraps are packed too tightly, sitting in liquid, or trapped in an airtight container, anaerobic bacteria take over. These bacteria produce hydrogen sulfide (rotten egg smell), ammonia, and other sulfur compounds that make your kitchen unbearable.
The key to odor-free composting is maintaining aerobic conditions in your kitchen collection system. Here's how.
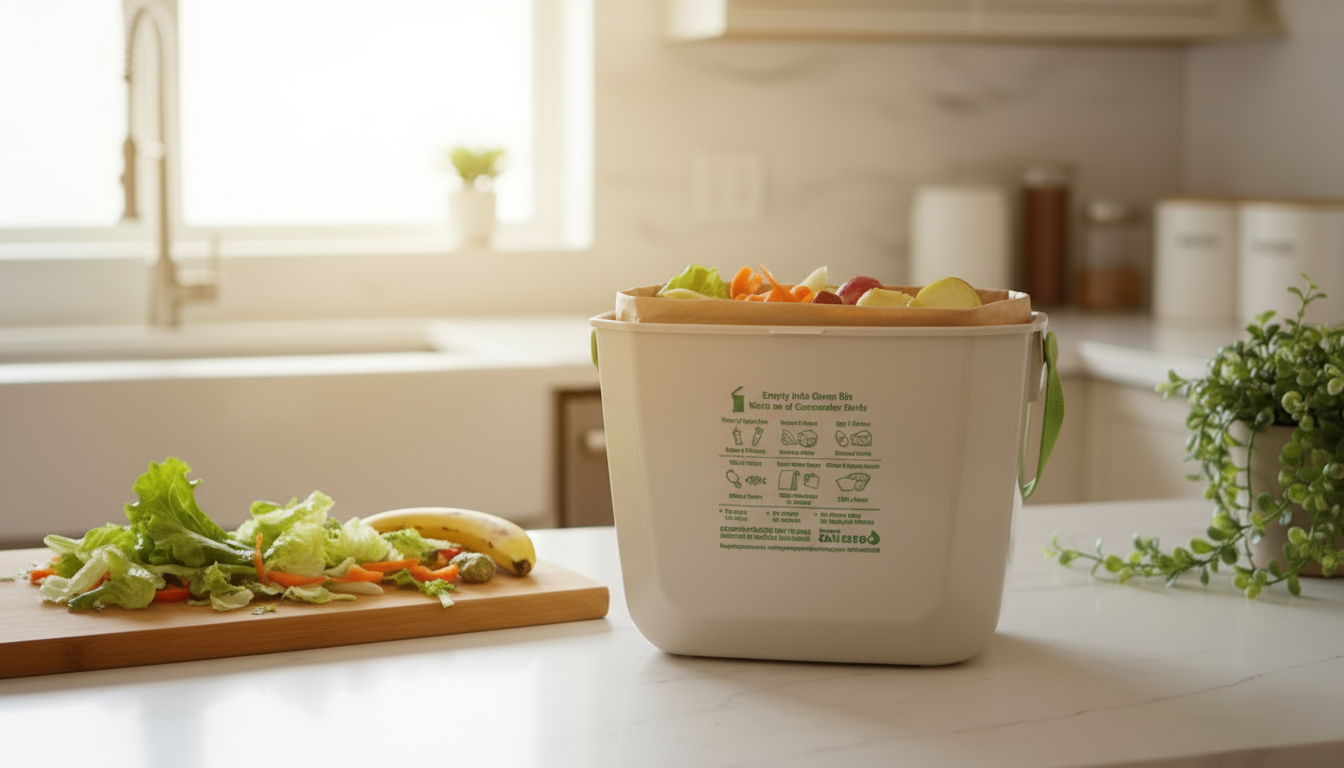
1. Ventilation Is Your Best Friend
This is the single most important factor in preventing compost odor. Your kitchen collection container needs air circulation to prevent anaerobic conditions from developing.
If you're using a solid container without ventilation holes, you're creating the perfect environment for smell-producing bacteria. Food releases moisture as it begins to break down. In a sealed container, that moisture has nowhere to go. It pools at the bottom, creating a soggy, oxygen-deprived environment where anaerobic bacteria thrive.
The solution? Use a collection system with built-in ventilation. This can mean:
- A countertop compost bin with air holes in the lid and sides
- A paper liner with micro-perforations that allow air circulation
- Leaving your container lid slightly ajar (though this invites fruit flies)
- Using a wire or mesh container (less practical for wet scraps)
Ventilation allows excess moisture to evaporate naturally, maintaining the drier conditions that keep odor-causing bacteria in check. In San Diego's relatively dry climate, this works especially well. Moisture evaporates quickly, leaving your scraps in that sweet spot where they're decomposing slowly without producing strong odors.
2. Empty Your Container Frequently
Even with perfect ventilation, you can't leave food scraps sitting indefinitely. The longer organic matter sits in your kitchen, the more it decomposes, and the stronger the odors become.
How often should you empty your kitchen compost? It depends on your climate and what you're composting:
- In San Diego's warm weather: Every 2-3 days maximum
- During cooler months: Every 3-4 days
- If you've added meat, dairy, or seafood: Within 2 days
- If your container is full: Immediately, regardless of time
Think of your kitchen compost container as temporary storage, not a composting system itself. The actual composting happens in your outdoor green bin or backyard pile. Your kitchen container is just a convenient collection point that should be emptied regularly.
Many people make the mistake of waiting until their container is completely full before emptying it. Don't. Establish a regular schedule—say, every Sunday and Wednesday—and stick to it regardless of how full your container is. This prevents organic matter from sitting long enough to develop strong odors.
3. Use Paper, Not Plastic
The type of liner you use in your kitchen compost container makes a huge difference in odor control.
Plastic bags—even those marketed as "compostable" bioplastics—create the same problem as a sealed container. They trap moisture against your food scraps, creating humid, oxygen-poor conditions. Even if the bag has a few small holes, it's not enough ventilation to prevent anaerobic conditions.
Paper liners are fundamentally different. Paper is a porous material that naturally allows air and moisture exchange. As your food scraps release moisture, the paper absorbs some of it and allows the rest to evaporate through the material. This keeps your scraps drier and maintains aerobic conditions.
Quality paper compost bags also dry out on the outside, which further reduces odor. Instead of a wet, slimy bag that smells terrible when you lift it, you get a relatively dry bag that's easy to handle and transport to your outdoor bin.
The environmental impact is better too. Paper bags break down completely in commercial composting facilities within weeks, while bioplastic bags often remain intact through the entire composting process, requiring removal before the finished compost can be used.
4. Layer Dry Materials with Wet Scraps
Balance is crucial in composting. Wet, nitrogen-rich materials (like vegetable peels, coffee grounds, and fruit scraps) decompose quickly and produce more odor. Dry, carbon-rich materials (like paper, dried leaves, or sawdust) decompose slowly and absorb excess moisture.
In your kitchen collection container, try layering wet scraps with dry materials:
- Add a handful of shredded newspaper or paper towels between layers of food scraps
- Tear up that junk mail and use it to absorb moisture (avoid glossy paper)
- Save dried leaves from your yard and sprinkle them over wet scraps
- Use sawdust or wood shavings if you have access to them
- Crumple up paper bags and stuff them between layers
These dry materials serve multiple purposes. They absorb excess liquid that would otherwise pool at the bottom of your container. They create air pockets that promote aerobic decomposition. And they help balance the carbon-to-nitrogen ratio, which reduces odor production.
You don't need to be scientific about this. A simple rule: every time you add something really wet or juicy (like watermelon rinds or coffee grounds), toss in a piece of torn newspaper or a handful of dried leaves.
5. Avoid These Odor-Producing Mistakes
Certain practices almost guarantee your compost will smell terrible. Avoid these common mistakes:
Don't add large amounts of liquid. Pour out excess liquid from containers before composting the solid food. That half-gallon of expired milk? Pour most of it down the drain and compost just the container residue. Same with soup, smoothies, or any other liquids.
Don't compact your scraps. Pressing food down to make more room in your container eliminates air pockets and creates anaerobic conditions. If your container is full, it's time to empty it, not pack it tighter.
Don't add hot food. Let cooked food cool to room temperature before adding it to your compost. Hot food accelerates decomposition, creates excess moisture through condensation, and produces stronger odors quickly.
Don't forget about your container. Out of sight shouldn't mean out of mind. If you hide your compost container under the sink or in a closet, you're more likely to forget about it and let it sit too long. Keep it visible so you remember to empty it regularly.
6. Choose the Right Location
Where you keep your kitchen compost container affects how quickly it develops odors. Consider these factors:
Temperature matters. The warmer your compost sits, the faster it decomposes and the stronger it smells. Don't place your container near the stove, in direct sunlight, or next to heat-producing appliances. A cool spot in your kitchen, away from heat sources, is ideal.
Visibility helps compliance. Counterintuitively, keeping your compost container visible—even on the counter—often works better than hiding it away. When it's visible, you're more likely to use it consistently and empty it before it becomes a problem. A well-maintained container on the counter smells less than a forgotten one under the sink.
Consider your routine. Place your container where you naturally prep food. If it's inconvenient to use, you'll generate odors by letting scraps pile up on cutting boards or in the sink before transferring them to the container.
7. Manage Fruit Flies Separately
Fruit flies and odor often appear together, but they're separate problems requiring different solutions.
Fruit flies are attracted to fermenting fruit, not necessarily to smell. You can have a completely odor-free compost container that still attracts fruit flies if you're not careful. The key is denying them access to your food scraps.
To prevent fruit flies:
- Always keep a lid on your compost container
- Don't let fruit scraps sit on counters or cutting boards
- Rinse your kitchen container with vinegar water when you empty it
- Take compost outside before fruit flies can lay eggs (within 24-48 hours of adding fruit)
- Cover fresh additions with a layer of paper or dry material
If fruit flies do appear, they'll die off quickly once you eliminate their access to food. Empty your container, clean it thoroughly, and maintain a closed system going forward.
8. Quick Odor Fixes When Problems Arise
Sometimes, despite your best efforts, your compost starts to smell. Here are quick fixes:
Immediate solution: Empty your container right now, even if it's not full. Take it outside, dump the contents in your green bin, and start fresh. Don't try to salvage a smelly container by just adding dry materials—the anaerobic bacteria are already established.
For mild odors: Add a generous layer of dry, absorbent material like shredded newspaper or dried leaves. This can sometimes absorb enough moisture to shift the balance back to aerobic decomposition.
Clean your container: Wash your kitchen container with hot, soapy water, then rinse with a vinegar solution. This kills odor-causing bacteria and removes residue. Let it dry completely before using it again.
Check your green bin: Sometimes the smell isn't coming from your kitchen container but from your outdoor bin. If your green bin smells terrible, it might be time to rinse it out (after collection day) or add more dry yard waste to balance wet food scraps.
The San Diego Advantage
San Diego residents have some natural advantages when it comes to odor-free composting. Our Mediterranean climate means low humidity most of the year, which helps moisture evaporate quickly from compost containers. Our mild winters mean you don't have to deal with frozen compost or bringing bins indoors during cold months.
Take advantage of this climate by using ventilated collection systems. The dry air will naturally wick away moisture, keeping your food scraps in that ideal state where they decompose slowly without producing strong odors.
Additionally, San Diego's weekly green bin collection means you never have to store organic waste for more than seven days. This regular pickup schedule prevents the long-term buildup that causes serious odor problems in areas with less frequent collection.
Creating a Sustainable Routine
The best odor prevention system is one you'll actually stick with long-term. Here's a simple routine that works for most households:
Daily: Add food scraps to your ventilated collection container as you cook and eat. Cover particularly wet or smelly scraps with a piece of paper or dry leaves.
Every 2-3 days: Empty your kitchen container into your outdoor green bin. This is non-negotiable in warm weather or if you've added meat, dairy, or seafood.
Weekly: On green bin collection day, give your outdoor bin a quick check. If it smells bad, hose it out after it's been emptied. Take a moment to evaluate your kitchen system—is anything not working?
Monthly: Thoroughly clean your kitchen compost container with hot, soapy water and vinegar. Replace any liners that are worn out.
This routine takes less than five minutes per day once established, and it prevents the odor problems that make people quit composting altogether.
The Bottom Line on Odor-Free Composting
Kitchen compost doesn't have to smell. The unpleasant odors that discourage so many people from composting are completely preventable with the right approach.
The key principles are simple: maintain air circulation, empty regularly, use breathable materials, and balance wet scraps with dry matter. These aren't complicated techniques requiring special equipment or scientific knowledge. They're basic practices that anyone can implement in any kitchen.
When you get these fundamentals right, composting transforms from a smelly chore into an effortless habit. Your kitchen stays fresh, your family stops complaining, and you divert hundreds of pounds of organic waste from landfills each year.
The environmental impact is significant. San Diego sends over 300,000 tons of organic waste to composting facilities annually. Every household that maintains an odor-free system is more likely to compost consistently, maximizing that diversion and minimizing the methane production that occurs when organic waste decomposes in landfills.
Start with just one change this week. Maybe it's emptying your container more frequently, or switching to a ventilated paper liner, or adding a layer of newspaper between scraps. Small adjustments create big improvements in odor control, making composting something you'll happily continue for years to come.
Looking for the easiest way to eliminate compost odor? EcoToss bags feature built-in micro-ventilation that keeps food scraps dry and odor-free. Made from 100% paper, they maintain aerobic conditions naturally while handling everything from coffee grounds to chicken bones. No smell, no mess, just simple composting that works.


